Linux: Assertion failed on job for iptables.service.

If you are using Centos 7 or RHEL 7 or any of it’s variant, you are probably using ‘Firewalld’ by default. Although, if you are a iptables fan like me, who likes it’s simplicity and manipulative nature instead of a full form firewall, then you probably have disabled firewalld from your CentOS 7 instance and using iptables. There are couple of servers, where I use runtime iptables rules for postrouting and masquerading. These rules are dynamically generated by my scripts instead of the sysconfig file under:

/etc/sysconfig/iptables

This file is generated upon running the iptables save command:

service iptables save

which I rarely do so.

Error Details

Which is why, I don’t have a /etc/sysconfig/iptables file in those servers and a common error I see while restarting iptables in those system is the following:

# systemctl restart iptables.service
Assertion failed on job for iptables.service.

How to Fix The Error

The error appears because you don’t have any rule in /etc/sysconfig/iptables or the file doesn’t exist either. You can ignore the error as iptables would still run. To eradicate the error, simply make sure you have some iptables rules loaded on your system using the status command:

iptables -S

And then, run:

service iptables save

Once done, restarting iptables shouldn’t show the error any longer.
Linux: Disable On-Access Scanning on Sophos AV

We use Sophos AV instead of ClamAV in couple of our linux servers. Sophos comes with on access scanning that uses a kernel module to trigger which file has been accessed unlike ClamAV which only come with signature and a basic scanning tool by default. It has it’s own benefit while drawbacks too. You have to give a certain amount of resources for Sophos. There are times, when you may require to disable the On Access Scanning on Sophos AV to diagnose different issues with the server.

To disable on access scanning on sophos AV, run the following from your terminal/ssh console:

/opt/sophos-av/bin/savdctl disable

To re-enable on access scanning on sophos AV, run the following:

/opt/sophos-av/bin/savdctl enable

Sophos log file is located here:

/opt/sophos-av/log

Sophos comes with multiple control binaries. They can be found at the following directory:

/opt/sophos-av/bin

You can find sophos binaries available at the man page too:

man savdctl

How to: Find dm number of a LVM logical volume

Sometimes, you will see the error thrown in dmesg or /var/log/messages are mentioned in dm-number format, while you manage the disk using lvm logical volume name. This is because lvm logical volumes are designed through kernel device mapper technique and kernel recognizes volumes using dm numbers. There is a tool to list all the device mappers used for block devices under Linux. Simply type the following to list the maps:

# lsblk

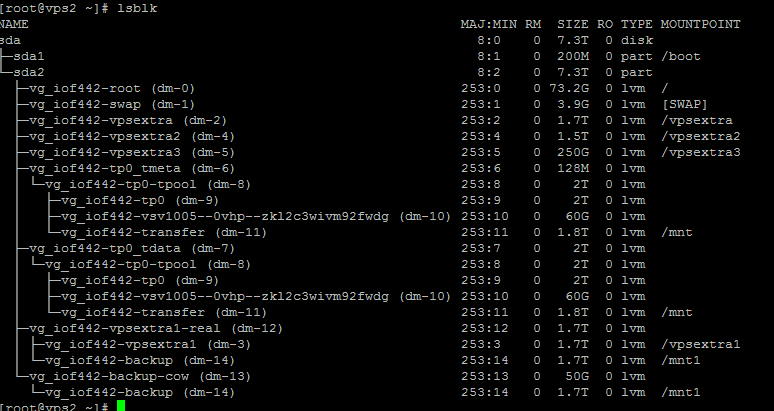
It shall show something like the following:

There you can see the dm number for each lvm volume is listed under first bracket. For example the swap in this server is created with LVM with the name vg_iof442/swap and has the dm-1 mapping.

How to: Find IOPS usage in a Linux Server

Question: How to find iops usage of a linux server?

Answer: Use iostat. Iostat is a tool comes with the ‘sysstat’ package. If you type iostat on your CentOS/Redhat server and it says the command not found, you can install sysstat to avail the iostat command.

yum install -y sysstat

An example iostat usage case could as simple as following:

iostat -x 1

-x tells iostat to give extended statistics which is required to find read/write iops individually. And the 1 tells iostat to repeat the command every 1s.

An example output would be like the following:

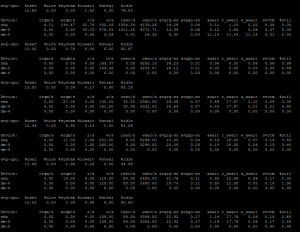
If you look at the output, the colum r/s would say the read iops and the colum w/s would say write iops. If you are using simple ‘iostat 1’ then the column tps should show the total iops of the disk in use.

If you are using a spinning disk, and if you are getting anything around 150-200 cumulatively, you are probably hitting the iops limit. With raid, the number would change according to your raid choice. Although, the number can increase in case of using Writeback SSD Cache, Hardware RAID Cache or Pure SSD disks. Most important benefit of using SSD is not essentially the amount of throughput it gives in a practical environment instead the amount of IOPS it can sustain is phenomenal.

Quick How To: Finding IO Abuser in KVM VM

I thought to write a quick how to on finding an abuser in a KVM VM Host. There is a tool shipped with libvirt is called ‘virt-top’. Virt-topĀ  has many usage case. It can be used to detect the IO Abuser. Most of the cases, you would see the abuser is throwing a lot of IO Requests regardless of the amount of IO being written or read. Which is why, it important to first identify if you are hitting the IOPS limit of your disk or not by using iostat. A common tool I regularly use to identify first hand disk problem is iotop as well. The following is the favorite iotop command:

iotop -oaP

-o will only show the threads that are actually doing IO in the server instead of all the sleeping threads, keeping the iotop result clean. ‘P’ will show only the processes instead of every single threads. Each VM can have thousands of threads which will show up on the process ID. ‘a’ is specifically my favorite, that does accumulated output. It will show you the sum of the usage for the time your interactive iotop is running.

Once you are done with the first hand investigation, you may now use virt-top to detect the VM activity further. A most used command for me to detect IO abuser is the following:

virt-top -3 –block-in-bytes -o blockwrrq

-3 tells the virt-top to find block device usage and find them by ‘bytes’ while the -o ‘blockwrrq’ means to sort the output by the write iops of the VM. You can use blockrdrq to sort the result by read iops too.

Once you can mix the output of virt-top and iotop results, you shouldn’t have difficulty to detect the VM that is abusing the IO on the server.

How to Enable TXT Record Addition/Edition in Cpanel

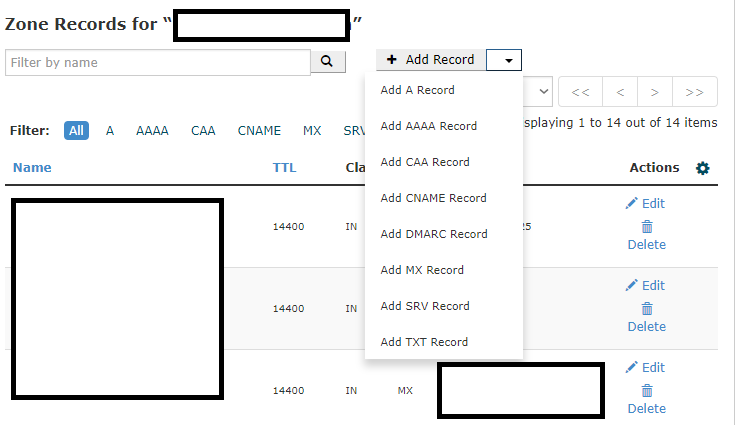
By default, if you are trying to add TXT record from cpanel, you would probably see a screen like the following

It doesn’t show the option to add TXT record. Basically, cpanel won’t allow the cpanel users to add TXT record with Simple DNS Zone Editor permission. It allows adding A, CNAME & MX record with that feature/permission set. To add permission to add TXT record and other, you need to enable Advanced DNS Zone Editor for the user’s feature list. If the user is under default list, go to root WHM >> Feature Manager >> Edit Default Feature list and enable Advanced DNS Zone Editor as following: