How to create Software RAID 1 on Fresh NVMe Drives in CentOS/RHEL

Let’s say, you just installed two NVMe drives. That means, you currently have the following devices on your system:

/dev/nvme0n1
/dev/nvme0n2

Now, to use Raid 1 on these devices, you need to first partition them. If your devices are less than 2TB, you can use label msdos with fdisk. But I prefer gpt with parted. I will partition the disks using parted.

Open the disk nvme0n1 using parted

parted /dev/nvme0n1

Now, set the label to gpt

mklabel gpt

Now, create the primary partition

mkpart primary 0TB 1.9TB

Assuming 1.9TB is the size of your drive.

Run the above process for nvme1n1 as well. This will create one partition on each device which would be like the following:

/dev/nvme0n1p1
/dev/nvme1n1p1

Now, you may create the raid, using mdadm command as follows:

mdadm --create /dev/md201 --level=mirror --raid-devices=2 /dev/nvme0n1p1 /dev/nvme1n1p1

If you see, mdadm command not found, then you can install mdadm using the following:

yum install mdadm -y

Once done, you may now see your raid using the following command:

[root@bd3 ~]# cat /proc/mdstat
Personalities : [raid1]
md301 : active raid1 sdd1[1] sdc1[0]
      976628736 blocks super 1.2 [2/2] [UU]
      bitmap: 0/8 pages [0KB], 65536KB chunk

md201 : active raid1 nvme1n1p1[1] nvme0n1p1[0]
      1875240960 blocks super 1.2 [2/2] [UU]
      bitmap: 2/14 pages [8KB], 65536KB chunk

md124 : active raid1 sda5[0] sdb5[1]
      1843209216 blocks super 1.2 [2/2] [UU]
      bitmap: 4/14 pages [16KB], 65536KB chunk

md125 : active raid1 sda2[0] sdb2[1]
      4193280 blocks super 1.2 [2/2] [UU]

md126 : active raid1 sdb3[1] sda3[0]
      1047552 blocks super 1.2 [2/2] [UU]
      bitmap: 0/1 pages [0KB], 65536KB chunk

md127 : active raid1 sda1[0] sdb1[1]
      104856576 blocks super 1.2 [2/2] [UU]
      bitmap: 1/1 pages [4KB], 65536KB chunk

unused devices: <none>

Here are a few key pieces of information about software raid:

  1. It is better not to use Raid 10 with software raid. In case the raid configuration is lost, it is hard to know which drives were set as stripe and which like a mirror by the mdadm. It is a better practice to use raid 1 as a rule of thumb with software raid.
  2. Raid 1 in mdadm doubles the read request in parallel. In raid 1, one request reads from one device, while the other request in parallel would read from the next device. This gives double read throughput when there is a parallel thread running. It still suffers from the write cost for writing data in two devices.

How to Find Drive Error in RAID Behind LSI RAID Card

Question: How can I see if the drives behind the hardware raid card using LSI has any reported error or not?

Solution

First, to find out if your drive raid arrays are optimal or not, you may run the following command:

[root@bd4 ~]# /opt/MegaRAID/MegaCli/MegaCli64 -LDInfo -Lall -aAll


Adapter 0 -- Virtual Drive Information:
Virtual Drive: 0 (Target Id: 0)
Name                :dr1
RAID Level          : Primary-1, Secondary-0, RAID Level Qualifier-0
Size                : 931.0 GB
Sector Size         : 512
Mirror Data         : 931.0 GB
State               : Optimal
Strip Size          : 64 KB
Number Of Drives    : 2
Span Depth          : 1
Default Cache Policy: WriteThrough, ReadAheadNone, Direct, No Write Cache if Bad BBU
Current Cache Policy: WriteThrough, ReadAheadNone, Direct, No Write Cache if Bad BBU
Default Access Policy: Read/Write
Current Access Policy: Read/Write
Disk Cache Policy   : Enabled
Encryption Type     : None
Default Power Savings Policy: Controller Defined
Current Power Savings Policy: None
Can spin up in 1 minute: No
LD has drives that support T10 power conditions: No
LD's IO profile supports MAX power savings with cached writes: No
Bad Blocks Exist: No
Is VD Cached: No


Virtual Drive: 1 (Target Id: 1)
Name                :
RAID Level          : Primary-1, Secondary-0, RAID Level Qualifier-0
Size                : 465.25 GB
Sector Size         : 512
Mirror Data         : 465.25 GB
State               : Optimal
Strip Size          : 64 KB
Number Of Drives    : 2
Span Depth          : 1
Default Cache Policy: WriteThrough, ReadAheadNone, Direct, No Write Cache if Bad BBU
Current Cache Policy: WriteThrough, ReadAheadNone, Direct, No Write Cache if Bad BBU
Default Access Policy: Read/Write
Current Access Policy: Read/Write
Disk Cache Policy   : Enabled
Encryption Type     : None
Default Power Savings Policy: Controller Defined
Current Power Savings Policy: None
Can spin up in 1 minute: Yes
LD has drives that support T10 power conditions: No
LD's IO profile supports MAX power savings with cached writes: No
Bad Blocks Exist: No
Is VD Cached: No


Exit Code: 0x00

This shall result in a key called ‘State’, which would say ‘Optimal’ if the raid is healthy. Although, it is possible that your drives have reported a few errors which might indicate a potential drive failure, which hasn’t been picked up by the RAID state yet. These errors are available under the following command:

/opt/MegaRAID/MegaCli/MegaCli64 pdlist a0

The above command lists the drive details. There are 3 error/failure counts, which are important to notice are ‘Media Error Count’, ‘Other Error Count’, and ‘Predictive Failure Count’. If you are seeing the number is changing quickly a few sets of times, then you should look at the drive status closely, as it seems to be producing a hardware failure soon. I have seen several times in my life, that the raid state saying it is ‘Optimal’, but the Media error was reported, soon after, we found the drive was actually failing.

To find out error counts in one go, you may use the following:

[root@bd4 ~]# /opt/MegaRAID/MegaCli/MegaCli64 pdlist a0 | grep -i "Predictive Failure Count" -B 6
Enclosure position: 1
Device Id: 2
WWN: 5000c5002834a246
Sequence Number: 2
Media Error Count: 0
Other Error Count: 0
Predictive Failure Count: 0
--
Enclosure position: 1
Device Id: 3
WWN: 5000c500461c9ec6
Sequence Number: 2
Media Error Count: 0
Other Error Count: 0
Predictive Failure Count: 0
--
Enclosure position: N/A
Device Id: 0
WWN: 4154412020202020
Sequence Number: 2
Media Error Count: 0
Other Error Count: 0
Predictive Failure Count: 0
--
Enclosure position: N/A
Device Id: 1
WWN: 4154412020202020
Sequence Number: 2
Media Error Count: 0
Other Error Count: 0
Predictive Failure Count: 0

Look at the count sections it has returned. Hope this helps.

How to Speed Up Software RAID (mdadm) Resync Speed

mdadm is the software raid tools used in Linux system. One key problem with the software raid, is that it resync is utterly slow comparing with the existing drive speed (SSD or NVMe). The resync speed set by mdadm is default for regardless of whatever the drive type you have. To view the default values, you may run the following:

[root@172 ~]# sysctl dev.raid.speed_limit_min
dev.raid.speed_limit_min = 1000
[root@172 ~]# sysctl dev.raid.speed_limit_max
dev.raid.speed_limit_max = 200000

As you see, the minimum value starts from 1000 and can max upto 200K. Although, it can max upto 200K, but as min value is too low, mdadm always tries to keep the value below average to your speed available. To speed up, we would like to maximize these numbers. To change the numbers, you may run something like the following:

sysctl -w dev.raid.speed_limit_min=500000
sysctl -w dev.raid.speed_limit_max=5000000

Once done, you may now check the speed is going up immediately:

[root@172 ~]# cat /proc/mdstat
Personalities : [raid1]
md3 : active raid1 sdb5[1] sda5[0]
      1916378112 blocks super 1.2 [2/2] [UU]
      [===============>.....]  resync = 76.2% (1461787904/1916378112) finish=27.4min speed=276182K/sec
      bitmap: 5/15 pages [20KB], 65536KB chunk

md0 : active raid1 sdb1[1] sda1[0]
      1046528 blocks super 1.2 [2/2] [UU]
      bitmap: 0/1 pages [0KB], 65536KB chunk

md2 : active raid1 sda2[0] sdb2[1]
      78576640 blocks super 1.2 [2/2] [UU]
      bitmap: 1/1 pages [4KB], 65536KB chunk

md1 : active raid1 sdb3[1] sda3[0]
      4189184 blocks super 1.2 [2/2] [UU]

unused devices: <none>

One thing to keep in mind is that, if you try to set the value too high, like we did, this might cause some handsome load on your system. If you see the load is unmanageable, you should focus on decreasing the number to something like 50k-100k for the min value.

Making The Sysctl Value Permanent

As we have established the kernel variable values on runtime, this would go back to default once we restart/reboot the server. If you want to persist the values, you need to put these values to /etc/sysctl.conf file. To make them persist, open the sysctl.conf file:

nano /etc/sysctl.conf

Add the following lines at the end of the file:

dev.raid.speed_limit_min = 500000
dev.raid.speed_limit_max = 5000000

Save the file, and run the following command:

sysctl -p

This should persist your values for those variables after the reboot as well as runtime.

Server Boots to Grub – OVH Servers – How to Fix

Error Details

After you have completed updating your yum, you saw the kernel got updated, and hence restarted the server to take the new kernel. But you find out that the server has never come online. Once you visit the KVM or Serial Console (SOL) of the system, you could see, your system is booted to ‘grub>’ console instead of booting from disk. How can you fix the system now?

Solution Intro

This specific issue can appear for any linux server, along with many reasons. Although, if you are running an server from OVH and had faced a similar issue, the boat I am going to show you can navigate to destination. Please note, in many other case of similar situation, you might end up fixing the grub with the same solution.

What and How the Problem Happened

OVH has an interesting strategy of booting. They follow everything through network PXE, even if it is not ‘netboot’, but just the local drives. For this to work out, you need PXE to take the latest grub details pushed once a kernel is updated. This is one reason why, OVH also supplies a custom kernel from a cusstom repo. Although, if you are using the stock kernel, you might come up with a situation, where the latest grub hasn’t been pushed to PXE and your system fails to boot from drives. It then puts you in the ‘grub’ of network.

How to Fix the Problem

Now, one thing is clear, after you completed a kernel update, your grub is broken due to the latest machine code is not available to the booting system. You can go and follow a regular grub repair method for Grub 2, to fix the situation. A couple of things to remember, as your system’s grub is failing to load, you have to use an independent rescue kernel to fix this, this could either be from a personal network repository or a rescue disk available from your datacenter’s location, like ovh has one. Another thing to remember, is that, if you are using CentOS 7 or Ubuntu with UEFI system, using mdadm or linux software raid, it is highly likely, your boot efi is placed in a non raid partition. Preferably in the first drive’s first partition. You can always verify this from your fstab file.

So the first job, is to boot your system into the rescue disk/cd/kernel. I assume you have done that with no difficulty. Once done, first mount your partitions. In OVH cases, it loads the mdadm automatically. In my case, it was /dev/md2.

mount /dev/md2 /mnt
# check what partition is used for /boot/efi
nano /mnt/etc/fstab
# in my case, it is /dev/nvme0n1p1 (It is a NVMe SSD, and the first partion is used for efi storage
mount /dev/nvme0n1p1 /mnt/boot/efi

Once we have mounted the partitions successfully, you may now chroot the system. Before chrooting, you want the dev, proc and sys to use the /mnt partitions respectively:

mount --bind /dev /mnt/dev
mount --bind /proc /mnt/proc
mount --bind /sys /mnt/sys

If these all goes well, now we can chroot the system:

chroot /mnt

Now you have successfully changed the root directory of the rescue kernel to the original drive’s root. All you need to do, is to remake the grub config, that will immediately generate the grub.cfg file and sync the machine code:

# we know grub.cfg is available in /boot/grub2/grub.cfg
grub2-mkconfig -o  /boot/grub2/grub.cfg
# once this is finished, we have to make sure, grub is also installed for both disks, for my case, these are /dev/nvme0n1 and /dev/nvme1n1
grub2-install /dev/nvme0n1
grub2-install /dev/nvme1n1

If you see the response is ‘No Error Reported’, then you are good go. You may now reboot your system back to hard disk, and can see your grub is able to load the latest kernel you installed from the original hard disk. Remember, for safety, you should umount all the partition, to avoid any data loss due to OS page cache:

# exit from chroot
exit
# unmount dev, proc, sys, /mnt/boot/efi, /mnt
umount /dev
umount /proc
umount /sys
umount /mnt/boot/efi
umount /mnt

Happy troubleshooting!

How To Get Disk Serial Number in Megaraid

Question:

We can use smartctl to get the disk serial ID in case of disk replacement or crashes, with the following:

smartctl -a /dev/sdX

Where X is the device identifier like, for the first disk, this would be sda, second sdb etc. But in case the devices are behind the RAID, this command returns an error:

[root@tampa-lb ~]# smartctl -a /dev/sda
smartctl 7.0 2018-12-30 r4883 [x86_64-linux-3.10.0-1127.el7.x86_64] (local build)
Copyright (C) 2002-18, Bruce Allen, Christian Franke, www.smartmontools.org

Smartctl open device: /dev/sda failed: DELL or MegaRaid controller, please try adding '-d megaraid,N'

How to make this work?

Answer:

To get the serial numbers behind the LSI MegaRAID, you would first need to find out the device ID using LSI Megaraid tools. A quick way to install LSI Megaraid tool is available here:

How to: Install LSI Command Line Tool

One you have installed the LSI Megaraid command line tools, now you may use the following command to identify your device:

/opt/MegaRAID/MegaCli/MegaCli64 -PDList -aAll | egrep 'Slot\ Number|Device\ Id|Inquiry\ Data|Raw|Firmware\ state' | sed 's/Slot/\nSlot/g'

This would output something like the following:

Slot Number: 1
Device Id: 11
Raw Size: 447.130 GB [0x37e436b0 Sectors]
Firmware state: Online, Spun Up
Inquiry Data: 50026B72822A7D3A    KINGSTON SEDC500R480G                   SCEKJ2.3

In this server, it has one disk, but you may have multiple disk with different ‘Firemware state’ and ‘Device Id’. To use smartmontools, you need to pick the ‘Device Id’, mentioned here, which is 11. Now you can run the following command to get the device details using smartctl:

smartctl -d megaraid,N -a /dev/sdX

Here, N is the device ID, and X is the device name, you may get the device name using df -h command or fdisk -l. For our case, this command would be like the following:

smartctl -d megaraid,11 -a /dev/sda

This would print a lot of information about your device, but if you are looking to identify the Serial Number only, you may run the following:

~ smartctl -d megaraid,11 -a /dev/sda|grep Serial
Serial Number:    50026B72822A7D3A

One thing to note, we can also get Serial number from the MegaCli tools Inquiry data, you may have already noticed:

[root@tampa-lb ~]# /opt/MegaRAID/MegaCli/MegaCli64 -PDList -aAll | grep 'Inquiry Data'
Inquiry Data: 50026B72822A7D3A    KINGSTON SEDC500R480G                   SCEKJ2.3

Here, the first parameter in the return is the same as smartctl returns as Serial number, it’s because it’s the serial number that megacli gets/identifies as well.

How to: Setup a server for R1Soft CDP backup?

We at Mellowhost has been utilizing R1Soft CDP backup for last 8 years. R1Soft has been a great backup tool even though the tool is immensely resource hoggy. At different times we had gone through different situations to handle our backup servers efficiently. After all the hiccups with backup nodes, we ended up efficiently configuring 3 backup servers of 3 different configuration

  1. backup1 = It contains 12TB file system on a RAID 0 array. It copies data to a BTRFS compressed drive once a week to keep the data safe if RAID 0 dies. This server uses RAID 0 for faster drive verification and block scanning by r1soft. This server hosts servers that requires frequent backing up and can sustain a loss of a week data (Less important data). As the server performs really fast due to being RAID 0, we can run multiple r1soft threads at a time including disk safe verification and block scans.
  2. backup2 = It contains 30TB file system in RAID 6 hardware array. This is used for hosting our VPS backups. This server is a seriously large one to keep backups of our enterprise VPS clients.
  3. backup3 = It contains 16TB file system in RAID 10 hardware array. This server is hosted in a East Coast American Location. It is our off network backup server and keeps backups for East Coast servers too.

One of the key factor in designing a backup server is the size and the location. Need to keep in mind that CDP 3 takes more space than CDP 2 for unknown reason while still being a differential backup solution, not just an incremental. Location of the server matters due to the network speed. If you are hosting your server a lot far than the server network, it may take longer time to complete the initial storage. Due to the latency it may fails to perform as fast like 1Gbps even if both network supports it. Just for an example, if you are backing up your data at 1MBps speed, it would take 12.13 days to complete backup of 1TB data [ Calculation: (((1024 x 1024) / 60) / 60) / 24 = 12.13 days ]. A 100Mbps port can give you speed upto 10MBps, while you can have 50MBps+ speed if you are using a 1Gbps network roughly. So why does the speed matter? If you are backing up your initial data in 13 days, that doesn’t mean it will be the same all the time. Your second backup would take much less amount of time as it only needs to upload the differential backups. That is true! But the problem will come when you require to do a bare metal restore. If your server requires a disaster recovery, you would then need 13 days to restore your server to the original state. Your customers won’t sit down for 13 days! While creating backup, it is important to think about disaster recovery too. How fast are you going to be able to restore the backup is an important concern while designing your disaster recovery solution.

I always recommend users to choose a 1Gbps network with a latency below 2ms if you want to have a good disaster recovery solution. This can guarantee a faster bare metal restore when needed.

The second key factor while creating the R1soft backup server would be to choose the RAID. If you are thinking to create r1soft backup on a non-raided solution, I think you should drop off your idea. RAID isn’t necessarily always use to keep your data safe, it can also be used for performance. Keeping a RAID 0 or striping in general is must for a R1Soft server. Otherwise, every couple of times, you are going to see a lot of stalled processes doing ‘disk safe verification’ ‘block scan’ etc etc and not able to keep the backup up to date or canceling processes due to duplicate backup process (Old one taking too long to complete). It is better not to choose RAID 5. I particularly didn’t try RAID 5, but I have used RAID – Z on ZFS file system, which was seriously slow for my work around. I switched the server later on to RAID 0 and BTRFS compression to keep a weekly backup which tremendously improved the R1Soft performance. We at later time, worked to create more backup servers with hardware RAID WB cache and battery backed unit to give us more performance benefit while creating and restoring backups. These servers have been performing tremendously well with R1Soft. They can also be called good disaster recovery node.

Last, I recommend you to understand that backup isn’t just keeping a copy of your data of your online existence. It is important to design a disaster recovery solution instead of just creating backups. If you are simply into creating backups, you probably don’t need R1Soft or any high end servers instead simple Rsync would work fine. But to create ‘Disaster Recovery’ solution, you need high level planning, good hardwares and good cost estimation. If you are leaving behind in any, you will probably fail to create a good disaster recovery solution that actually ‘works’.

How to: Find IOPS usage in a Linux Server

Question: How to find iops usage of a linux server?

Answer: Use iostat. Iostat is a tool comes with the ‘sysstat’ package. If you type iostat on your CentOS/Redhat server and it says the command not found, you can install sysstat to avail the iostat command.

yum install -y sysstat

An example iostat usage case could as simple as following:

iostat -x 1

-x tells iostat to give extended statistics which is required to find read/write iops individually. And the 1 tells iostat to repeat the command every 1s.

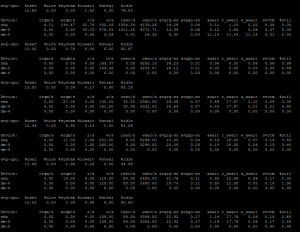
An example output would be like the following:

If you look at the output, the colum r/s would say the read iops and the colum w/s would say write iops. If you are using simple ‘iostat 1’ then the column tps should show the total iops of the disk in use.

If you are using a spinning disk, and if you are getting anything around 150-200 cumulatively, you are probably hitting the iops limit. With raid, the number would change according to your raid choice. Although, the number can increase in case of using Writeback SSD Cache, Hardware RAID Cache or Pure SSD disks. Most important benefit of using SSD is not essentially the amount of throughput it gives in a practical environment instead the amount of IOPS it can sustain is phenomenal.

Backing up LVM Cache Volume?

I have been trying to explore what options do we have to use SSD Cache with a HDD driven servers to create faster writes. There are both software and hardware solutions. Hardware solution comes to CacheCade which isn’t really costly at all (roughly costs 250$ extra per license), though I was interested to explore all the software solution that are currently available in the market.

There are bcache, flashcache & lvm cache, that are mostly used in production servers. I firstly discarded bcache because it requires you to format the disk with bcache, that triggers the less flexibility check for a module. I tried flashcache before, and don’t want to go with it in a production server any longer as the module is discontinued (It still works, don’t get me wrong). All it seems, lvm cache is the only one which is stable and going to improve over days.

LVM Cache does work great. With the smq lvm cache policy, writeback cachemode & deadline scheduler, you can reach 220MBps write speed with Intel SSD in RAID 1, which is normally available in a RAID 1 Intel SSD. You can double the speed by putting a RAID 10 SSD array to back the cache. Although, after all the test was done, I realized that lvm cache doesn’t support snapshot unfortunately. At least not yet, at the time I am writing the blog. Without the snapshot facility, the performance benchmark actually goes in vain.

Snapshots of cache type volume vg0/newvz is not supported.

Hardware solutions are always useful as the backend setup goes transparent to the OS, which allows us to use our own tool without worrying about the caching setup. Cachecade is probably the only available solution right now with all facilities for SSD cache in production servers.

How much data does Mellowhost have in their Backup?

It should be pretty known if you are a Mellowhost customer that we backup our servers on daily basis. We are currently using R1Soft CDP for each of our servers. All the backup servers are offsite, that means they are not hosted in the same server you are using with Mellowhost and not even in Softlayer network. Continue reading “How much data does Mellowhost have in their Backup?”

48 restless hours!

RAID is not a backup solution, it is proved again! I was planning to write my experience of 48 hours from July 22 7:17 to July 24 7:23 GMT -5, couldn’t really manage to get some time. All the users who were in the Hemonto server should be aware about the recent issue we faced with our RAID. This post is just to elaborate how did we handle the situation.

Continue reading “48 restless hours!”