How to: Use WINMTR to Diagnose Network Issues

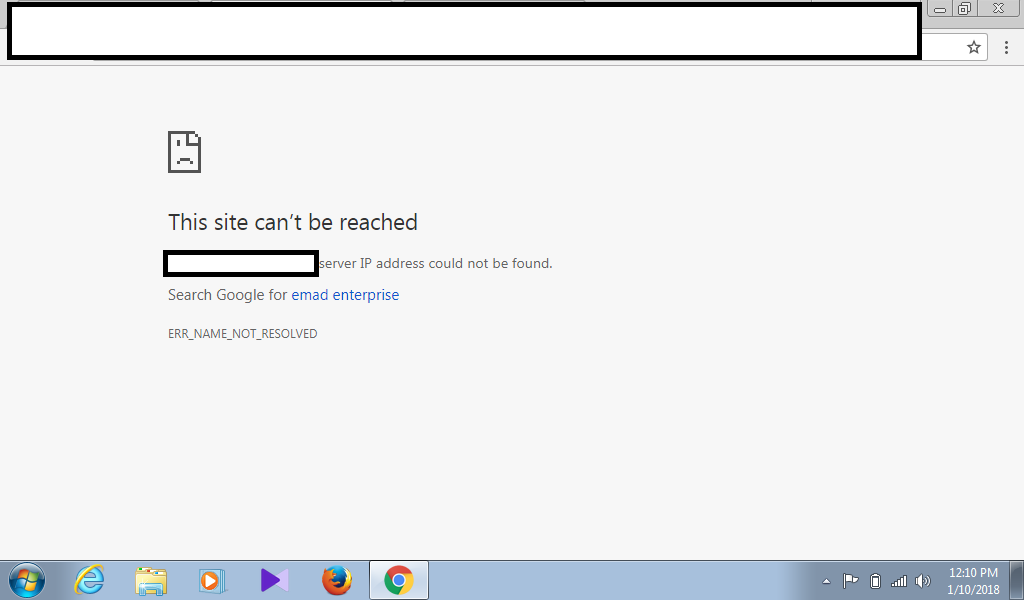
MTR is a great tool to understand if there is a routing issue. There are many times, customer says the website/web server is slow or not being able to access the network etc. After some basic checks, if no solution is concluded, it is important to get a MTR report from the client. As most of the users use Windows, it is common to use WinMTR.

To run WINMTR, you need to first download it from here:

https://sourceforge.net/projects/winmtr/

or here

https://winmtr.en.uptodown.com/windows

Once the app is downloaded, double clicking it will open it. WinMTR is a portable executable binary. It doesn’t require installation.

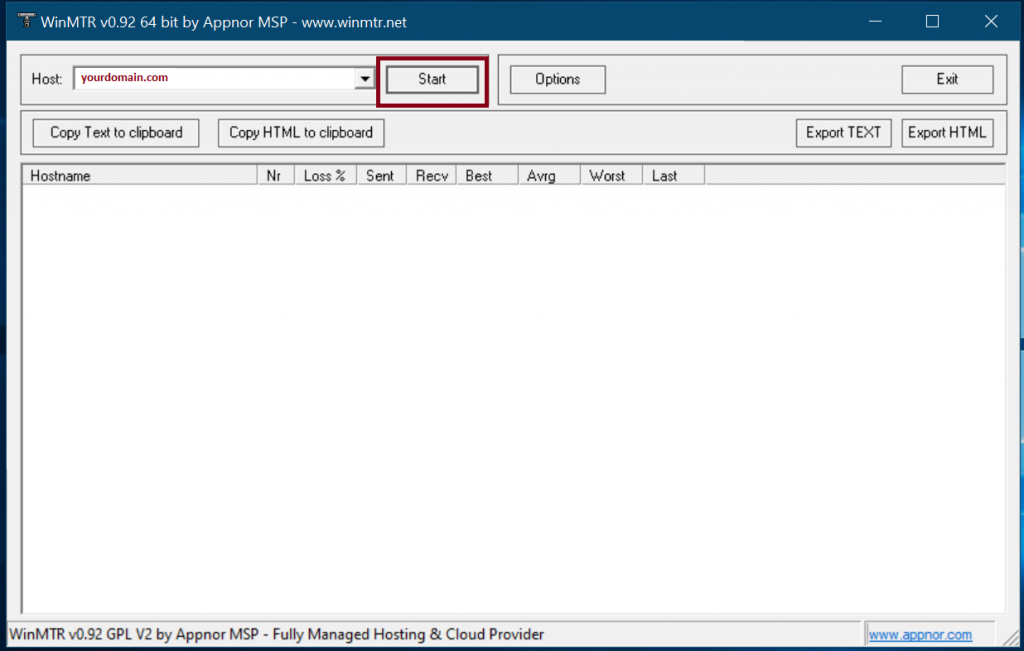
Once opened, you can enter the ‘domain name’ that is having trouble in the ‘Host’ section and press start.

Start winMTR by entering your domain in the Host section

Once you start, it will start reaching the domain you entered and hit each of the node it passes for routing, with giving the amount of drops each node is hitting

WintMTR running – (I have hidden two hops for privacy)

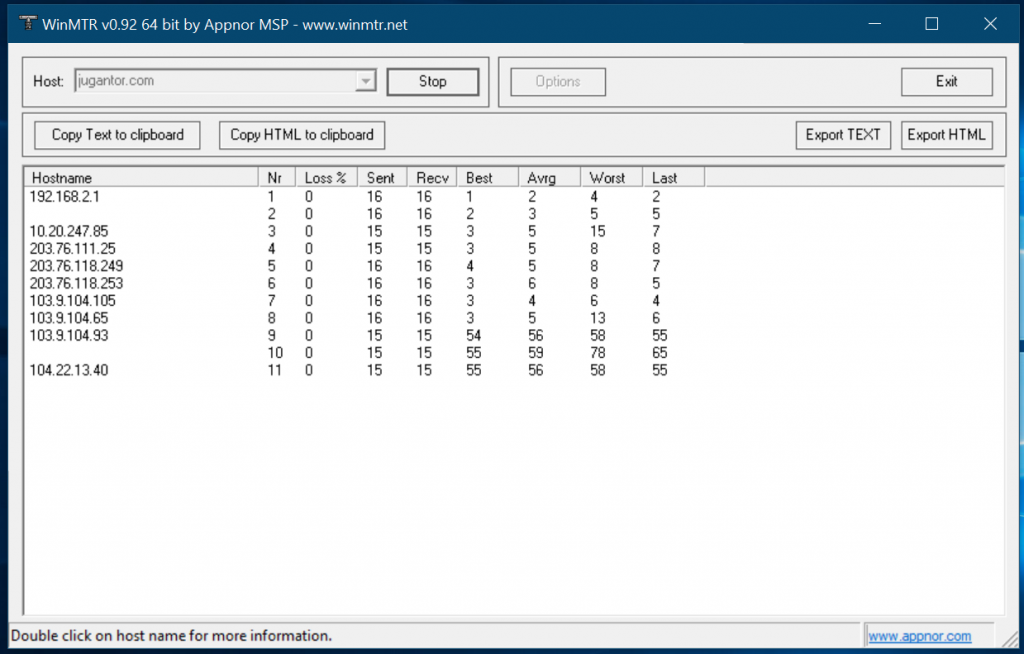
If you are seeing drops of anything above 2-5%, that node is problematic. If the node is dropping a lot, but the next node isn’t dropping enough, then the node is set to transparently hiding the packet responses for security, then that node is not problematic. So if your packet isn’t reaching the destination and it is dropping somehwere or looping in a node, that means, the problem is within that node. Now you can locate the node and see where does it belong. If it belongs to within your territory, then the issue is within your ISP or IIG. But if it is outside your territory but at the end of the tail, then the issue is with the Host.

In most case, we ask for running the MTR for 5 minutes and then export to TEXT and send it over for us to analyse to customers. You can export the report by stopping the MTR and clicking ‘Export TEXT’ available in the winMTR window.

Troubleshoot: Server IP address could not be found

I had a client ticket today, with the following screenshot:

The error says, ‘server IP address could not be found’. This type of error means there is a DNS resolution error. There could be 3 possibilities:

  1. Client hasn’t updated the dns nameservers for the domain
  2. Host’s DNS server is down.
  3. Client’s DNS resolver isn’t working.

To check if the client has updated the proper dns nameservers, you can use intodns.com. It will also tell you if the host DNS is down or not. If both are ok, you should check if you are able to load other domains using your Internet, if not, it has things to do with the local DNS resolver of your desktop or the ISP. In my case, it was client who failed to update the nameservers of the domain. All that was required to update the nameservers with the server ones.

Troubleshooting: Imunify360 database is corrupt. Application cannot run with corrupt database

Error Message:

# service imunify360 start
Starting imunify360: WARNING [+ 3743ms] defence360agent.utils.check_db|DatabaseError detected: database disk image is malformed
WARNING [+ 3766ms] defence360agent.cli.subparsers.common.server|Imunify360 database is corrupt. Application cannot run with corrupt database. Please, contact Imunify360 support team at https://cloudlinux.zendesk.com

Detail Information & Explanation:

If you are using imunify360, an application firewall for linux servers by Cloudlinux team, you might incur an error where it says the database is corrupt. You might first see ‘Imunify360 is not started’ error from the WHM panel and end up getting the above error message as stated. Imunify360 uses a SQL database, located under ‘/var/imunify360/imunify360.db’. This image is checked everytime Imunfi360 tries to start, and if the database is malformed, it would not start. Fortunately, imunify360 comes with tools to handle this database and recover if corrupted.

How to Fix:

First, we start by running database integrity check. This can be done using the following:

imunfiy360-agent checkdb

(From Imunify360 Doc: checkdb  – Check database integrity)

Once done, you can now use ‘migratedb’ to repair and restore if the database is corrupted.

imunify360-agent migratedb

(From Imunify360 Doc: migratedb – Check and repair database if it is corrupted.)

If migratedb fails, the only way to recover this is to reinstall imunify360.

Linux How To: Install IPTABLES in CentOS 7 / RHEL 7 Replacing FirewallD

CentOS 7 / RHEL 7 doesn’t come with iptables by default. It uses a full functional firewall system called ‘firewalld’. I have been a big fan of iptables and it’s capability from the very first, and since I have switched to CentOS 7, I couldn’t stop using it. I had to stop firewalld and install iptables in all of my CentOS 7 installation and start using iptables rules as I was using before. Here is a small How To guide on installing Iptables and disabling firewalld from a CentOS 7 or RHEL 7 or a similar variant distro.

How to Install IPTABLES in CentOS 7

To begin using iptables, you need to download and install iptables-service package from the repo. It isn’t installed automatically on CentOS 7. To do that, run the following command:

# yum install iptables-services -y

How to stop the firewalld service and start the Iptables service

Once the iptables-serivces package is installed, you can now stop the firewalld and start the iptables. Keeping both kind of network filtering too can create conflicts and it is recommended to use any out of two. To do that run the following:

# systemctl stop firewalld
# systemctl start iptables

Now to disable firewalld from the starting after the boot, you need to disable the firewalld:

# systemctl disable firewalld

To disallow starting firewalld manually as well, you can mask it:

# systemctl mask firewalld

Now you can enable iptables to start at the boot time by enabling iptables using systemctl command:

# systemctl enable iptables

How to check status of iptables in centOS 7

In previous distros, iptables status could be fetched using service command, although, the option is no longer available in CentOS 7. To fetch the iptables status, use the following:

# iptables -S

Iptables save command can still be used using service tool:

# service iptables save

This would save your iptables rules to /etc/sysconfig/iptables as it used to do in previous distros.

A new WordPress Firewall Plugin

I had written a blog post regarding “How to protect your wordpress blog from web injection” before. I had mentioned a firewall plugin called “WordPress Firewall” which used to be very helpful at the time I had written the blog. But it seems the updated version of WordPress Firewall 1 & 2 both were not updated for pretty long time. It is now better to switch to something else. Upon my research of the current plugin market, I find the following WordPress Firewall plugin very useful “All in one WordPress Security & Firewall“.

So, take sometime to go on a maintenance for your wordpress blog and install the latest option to secure your blog.

Postrouting and IP Masquerading in Linux

IPTables is responsible to handle packet filtering in Linux system. IPTables contains several predefined and/or user-defined tables. Each table contains chains and chain contain packet rules. IPTables uses NAT table to forward packets to another node.

Continue reading “Postrouting and IP Masquerading in Linux”