Programming: How To Check if an IP is Available or Not in Bash

How To Check if an IP is Available or Not in Bash

A quick trick I use is ‘ping’ command. PING will return 0 on success and 1 or above on failure while using it with -c 1 (Means only one ICMP packet). That makes it useful to use with a if condition shell code as following:

if ping -c 1 -w 5 192.168.2.1 >/dev/null
then
echo "IP Available"
else
echo "IP Not Available"

Programming: How to Check If A File Exists or Not in Bash Script

How to Check If A File Exists or Not in Bash Script

You can use if condition in bash script to do that. If conditions takes ‘-f’ to test if a file exists or not. Syntax would be the following:

$FILE = $1
if [ -f $FILE ]; then
echo "File Exists"
else
echo "File Do Not Exist"
endif

Now, if your script only demands to check if the file do not exist, you can use a unary operator for negate the boolean value as following:

$FILE = $1
if[ ! -f $FILE ]; then
echo "File Do Not Exist"
endif


How To: Restrict a Folder to Your IP Only

Sometimes, for development purposes, you may want to restrict access to the folder, only to your IP, and deny others from accessing that folder. One way to do that is to use htaccess rules. A common rule, could be denying all the users and allowing your IP. To find out, your IP, you may visit the following:

http://ifconfig.co

Note the IP it has reported. Open the folder that you want to protect. Find the .htaccess file under the folder (If no file available, create one) and add the following:

order deny,allow
deny from all
allow from <your IP goes here>

Replace the <your IP goes here> from the snippets with the IP you have noted from ifconfig.co. Now, your folder should be accessible only from your IP.

Programming: Laravel Error – Specified Key Was Too Long

A common error I have seen users reporting using Laravel, is the following:

SQLSTATE[42000]: Syntax error or access violation: 1071 Specified key was too long; max key length is 767 bytes

The error actually happens because Laravel 5.5 assumes you have MySQL 5.7.7 or above. While on MySQL 5.7.7 the key size was increased than the older versions.

How to fix laravel Specified key was too long

To fix this, find the AppServiceProvider.php file under app/Providers folder, and add the following line before start of the class:

use Illuminate\Support\Facades\Schema;

Then, inside the boot() method under the class, add the following line:

Schema::defaultStringLength(191);

If you restart your laravel migration or the query, it should work fine now.

How To: Start a Screen Session and Run a Command at a Time

Sometimes, you may want to run a screen command in a remote server. That makes it necessary to run the command inside the screen session while starting it.

How to start a screen session and run a command in one line

# screen -d -m sh -c "yourcommand"

From the man page of Screen:

-d -m : Start screen in “detached” mode. This creates a new session but doesn’t attach to it. This is useful for system startup scripts.

sh -c: Starts a shell and runs a command for you.


How To: Install AutoSSL for Server Hostname – Cpanel Server

How about install Let’s Encrypt for Cpanel?

Before we start, you may first want to install Let’s Encrypt to use an Immediately Issuing provider for your SSL in Cpanel?

https://mellowhost.com/blog/how-to-install-lets-encrypt-in-cpanel.html

Once done, you may now continue using this tutorial to install Let’s Encrypt for your Service SSL in Cpanel/WHM/Webmail.

How To Install AutoSSL for Server Hostname / Webmail / Cpanel / WHM

Starting from Cpanel 11.58, Cpanel is offering Free SSL, issued by ‘Cpanel INC’ for free of charge to the valid cpanel license owner. If you are using cpanel, login to your WHM >> Providers >> Enable Cpanel & from Options >> Check Allow AutoSSL to replace invalid or expiring non-AutoSSL certificates.

Now, running upcp should automatically install the free SSL for your cpanel server hostname. If it doesn’t, it is probably because your server IP and the hostname IP are resolving to wrong address. To understand and troubleshoot the problem, run the following script from command line:

# /usr/local/cpanel/bin/checkallsslcerts

This script checks and installs certificate for expired, invalid and self signed certificates for the server services. If you are seeing an error like the following:

[WARN] The system failed to acquire a signed certificate from the cPanel Store because of the following error: (XID 62hp6x) The system queried for a temporary file at “http://server91.mellowhost.com/.well-known/pki-validation/D92868E512FB02354F2498B94E67430B.txt”, but the web server responded with the following error: 404 (Not Found). A DNS (Domain Name System) or web server misconfiguration may exist.

It means, your hostname is resolving to the wrong IP. You would need to check if the hostname is resolving to an IP which has first virtualhost pointed to /var/www/html or not under /etc/apache2/conf/httpd.conf
Troubleshoot: You must upgrade to Litespeed “5.2.1 build 2 or later”, in order to upgrade to the next version of cPanel & WHM.

Error Message

You must upgrade to Litespeed “5.2.1 build 2 or later”, in order to upgrade to the next version of cPanel & WHM.

Explanation

The error appears because Litespeed below 5.2.1 doesn’t have SSL compatibility with Cpanel 11.68. Although, this goes further, if you uninstall the plugin, and upcp will still fail to update the Cpanel/WHM. A workaround for this, is to install and uninstall the plugin through Litespeed auto installer. Here is how to do that:

Download Litespeed Auto Installer for Cpanel

# wget https://www.litespeedtech.com/packages/cpanel/lsws_whm_autoinstaller.sh
# chmod a+x lsws_whm_autoinstaller.sh

Install Litespeed for Cpanel/WHM using Auto Installer

# ./lsws_whm_autoinstaller.sh TRIAL 1 8080 username testpass1234 [email protected] 1 0

Uninstall Litespeed

# /usr/local/lsws/admin/misc/uninstall.sh

Uninstall Litespeed WHM Plugin

# /usr/local/cpanel/whostmgr/docroot/cgi/lsws/lsws_whm_plugin_uninstall.sh

Run upcp:

# /scripts/upcp --force

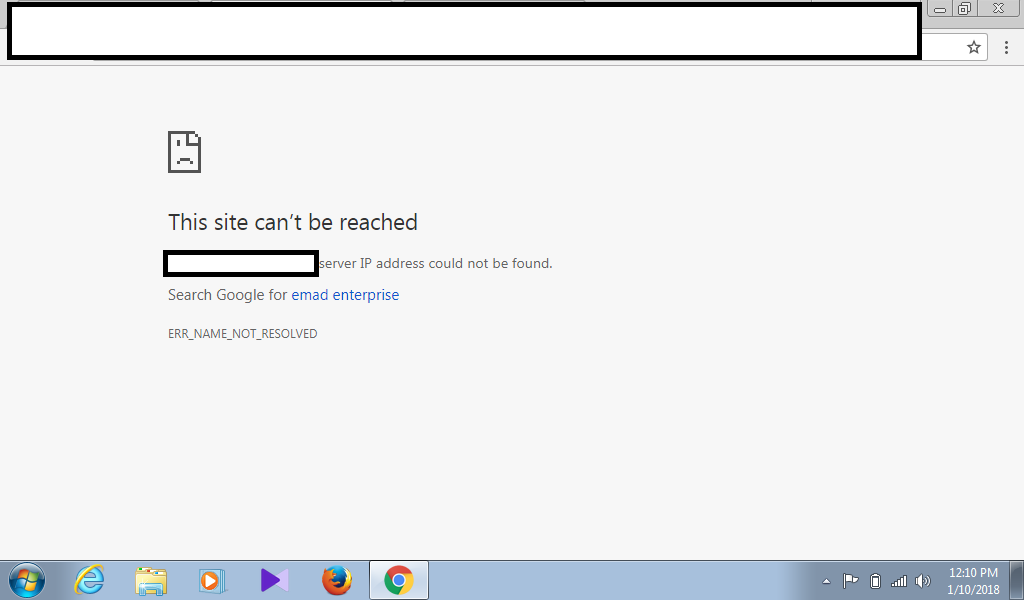
Troubleshoot: Server IP address could not be found

I had a client ticket today, with the following screenshot:

The error says, ‘server IP address could not be found’. This type of error means there is a DNS resolution error. There could be 3 possibilities:

  1. Client hasn’t updated the dns nameservers for the domain
  2. Host’s DNS server is down.
  3. Client’s DNS resolver isn’t working.

To check if the client has updated the proper dns nameservers, you can use intodns.com. It will also tell you if the host DNS is down or not. If both are ok, you should check if you are able to load other domains using your Internet, if not, it has things to do with the local DNS resolver of your desktop or the ISP. In my case, it was client who failed to update the nameservers of the domain. All that was required to update the nameservers with the server ones.

Quick Tip: How to Check Total Number of Mails in Postfix Queue

Exim provides a quick way to check the total number of mails in the queue. This is done using the exim -bpc Although, this is not the same for postfix. Postfix doesn’t come with an easy way to do that.

How to Check Total Number of Mails in Postfix Queue

A quick tip on what I use to check the postfix queue number is the following command:

# mailq | tail -n 1
-- 6899 Kbytes in 1518 Requests.

Basically, postfix returns the queue statistics at the end of the queue listing command. We are simply tailing that to find the number.


How To: Clear Postfix and Exim Queue

How to clear postfix queue

Postfix queue can be cleared using the postsuper command. The syntax is as following:

# postsuper -d ALL

It will clear all the postfix queue. You can specifically clear the deferred emails for example from the postfix queue as following:

# postsuper -d ALL deferred

If you have a large quantity in postfix queue, there is actually a quicker and easier way to do that. You can simply remove all the folders under /var/spool/postfix and it will clear the queue.

# rm -Rf /var/spool/postfix/*
# mailq | tail -n 1
Mail queue is empty

Note: The folders inside postfix would get created automatically once the queue starts filling up, nothing to worry about.

How to clear Exim Queue

Exim queue can be checked using the following:

# exim -bp

To check the number of mails in queue, you can use:

# exim -bpc

To remove a message from exim queue, you need to use the following:

# exim -Mrm {message-id}

There is no build in command to clear all the mails from exim queue. You can use a pipe command to clear the exim queue as following:

# exim -bp | exiqgrep -i | xargs exim -Mrm

Although, there are even quicker and easier way to clear the exim queue, specially if you have a lot of emails in queue and the server is pretty loaded.

# rm -Rf /var/spool/exim/input

Removing the input directory should clear the exim queue. Note: The directory would automatically create once the exim starts it’s queue again, no need to worry.