How To Send Email From an IP without Authentication – Cpanel/WHM

Since antirelayed is removed by the cpanel team from the latest cpanel, the situation might arise to some people, at least to me. I had a server sending mails without authentication, a trusted IP. Now, how to do this with the latest Cpanel/WHM?

Well, Cpanel still keeps the facility called ‘alwaysrelay’. This one was there when antirelayed was there. Antirelayed used to allow relay for an IP without authentication for a specific period of time, while ‘alwaysrelay’ will allow relaying all the time.

All you need to do, is to add the IP in the following file in a new line:

/etc/alwaysrelay

and restart the Exim:

service exim restart

That should be it. Remember, you might encounter the exim report cpaneleximscanner found your email to be spam. In such cases, go to WHM >> Service Configuration >> Exim Configuration Manager >> Set the following option to ‘Off’ : Scan outgoing messages for spam and reject based on the Apache SpamAssassin™ internal spam_score setting

and Save. Now you may check, it should work.

How to Skip WHM Initial Setup Wizard When Stuck After Upcp

If you have recently ran upcp and the WHM initial setup wizard is stuck in a URL like the following:

https://yourhostname.com:2087/cpsess*****/scripts/initial_setup_wizard1

And can not get away with it, here is the easy way to do it. Basically each setup wizard has a skip button and the button goes to initial_setup_wizard1_do, so only adding the _do at the of your initial_setup_wizard1 should do the job, like the following:

https://yourhostname.com:2087/cpsess*****/scripts/initial_setup_wizard1_do/

This should take you to the WHM home by letting you save some of the new WHM features and will not ask again for initial setups.

Quick Tips: An error occurred. Your account may be over its quota or you attempted to upload a folder – Cpanel

An error occurred. Your account may be over its quota or you attempted to
upload a folder.

The error is very obvious. It means the account is over the quota. But what if it isn’t? This error is generic, cpanel throws this, whenever it fails to upload the file, regardless of what error it returns. There is a possibility that your IDS (Intrusion detection system) is discarding the upload, so double checking the IDS log should help you to conclude that. But what if, that is also not the case?

Ok, that can actually still happen. It happens when the customer uses cloudflare and uses cloudflare to login to the cpanel using cpanel proxy and then use it to upload the file. Cloudflare sees the upload going through web and blocks it. So, just double check the domain he uses to login to the cpanel, and check whether it uses some kind of 3rd party web application firewall loaded application or not like Cloudflare. If it does, that could be the case!

How To: Install AutoSSL for Server Hostname – Cpanel Server

How about install Let’s Encrypt for Cpanel?

Before we start, you may first want to install Let’s Encrypt to use an Immediately Issuing provider for your SSL in Cpanel?

https://mellowhost.com/blog/how-to-install-lets-encrypt-in-cpanel.html

Once done, you may now continue using this tutorial to install Let’s Encrypt for your Service SSL in Cpanel/WHM/Webmail.

How To Install AutoSSL for Server Hostname / Webmail / Cpanel / WHM

Starting from Cpanel 11.58, Cpanel is offering Free SSL, issued by ‘Cpanel INC’ for free of charge to the valid cpanel license owner. If you are using cpanel, login to your WHM >> Providers >> Enable Cpanel & from Options >> Check Allow AutoSSL to replace invalid or expiring non-AutoSSL certificates.

Now, running upcp should automatically install the free SSL for your cpanel server hostname. If it doesn’t, it is probably because your server IP and the hostname IP are resolving to wrong address. To understand and troubleshoot the problem, run the following script from command line:

# /usr/local/cpanel/bin/checkallsslcerts

This script checks and installs certificate for expired, invalid and self signed certificates for the server services. If you are seeing an error like the following:

[WARN] The system failed to acquire a signed certificate from the cPanel Store because of the following error: (XID 62hp6x) The system queried for a temporary file at “http://server91.mellowhost.com/.well-known/pki-validation/D92868E512FB02354F2498B94E67430B.txt”, but the web server responded with the following error: 404 (Not Found). A DNS (Domain Name System) or web server misconfiguration may exist.

It means, your hostname is resolving to the wrong IP. You would need to check if the hostname is resolving to an IP which has first virtualhost pointed to /var/www/html or not under /etc/apache2/conf/httpd.conf

Troubleshoot: You must upgrade to Litespeed “5.2.1 build 2 or later”, in order to upgrade to the next version of cPanel & WHM.

Error Message

You must upgrade to Litespeed “5.2.1 build 2 or later”, in order to upgrade to the next version of cPanel & WHM.

Explanation

The error appears because Litespeed below 5.2.1 doesn’t have SSL compatibility with Cpanel 11.68. Although, this goes further, if you uninstall the plugin, and upcp will still fail to update the Cpanel/WHM. A workaround for this, is to install and uninstall the plugin through Litespeed auto installer. Here is how to do that:

Download Litespeed Auto Installer for Cpanel

# wget https://www.litespeedtech.com/packages/cpanel/lsws_whm_autoinstaller.sh
# chmod a+x lsws_whm_autoinstaller.sh

Install Litespeed for Cpanel/WHM using Auto Installer

# ./lsws_whm_autoinstaller.sh TRIAL 1 8080 username testpass1234 [email protected] 1 0

Uninstall Litespeed

# /usr/local/lsws/admin/misc/uninstall.sh

Uninstall Litespeed WHM Plugin

# /usr/local/cpanel/whostmgr/docroot/cgi/lsws/lsws_whm_plugin_uninstall.sh

Run upcp:

# /scripts/upcp --force

SMTP Error: 550 Please turn on SMTP Authentication in your mail client – IP is not permitted to relay through this server without authentication

We had a customer complaining about a commonly seen error of the following type:

550 Please turn on SMTP Authentication in your mail client. mail-pf0-f172.google.com [209.85.192.172]:38632 is not permitted to relay through this server without authentication.

Diagnostic-Code: smtp; 550-Please turn on SMTP Authentication in your mail client. 550-mail-pf0-f172.google.com [209.85.192.172]:38632 is not permitted to relay 550 through this server without authentication.

reason: 550-Please turn on SMTP Authentication in your mail client.
550-mout.kundenserver.de [212.227.17.24]:49392 is not permitted to relay
550 through this server without authentication.

They were all basically the same error. This is a common error and the solution is pretty simple as it looks like. Enabling ‘SMTP Authentication’ on the outlook or the mail client should solve the problem. But interestingly, the client was smart and he wasn’t doing any mistake with ‘SMTP authentication’. The error was actually showing up when someone was trying to send the mail to him (As a receiver SMTP). We then tried digging the error further.

There is something we need to remember. SMTP is not only authenticated using username and password, it also goes through a dns authentication check too. If your dkim/domainkeys/spf/dmarc do not match as the mail server has advised, the mail will get denied with the same type of error (Error code 550). We then realized the customer account was transfered earlier from a different server and the old domainkeys were still there in it’s DNS zone file. As domainkeys are RSA keys generated per server, it is important to regenerate the keys after the server change. Otherwise, the old key check through the DNS can trigger the 550 error from the receiver relay. We had deleted and generated a new domainkeys for the customer and the error went off.

phpMyAdmin Coming Blank in Cpanel

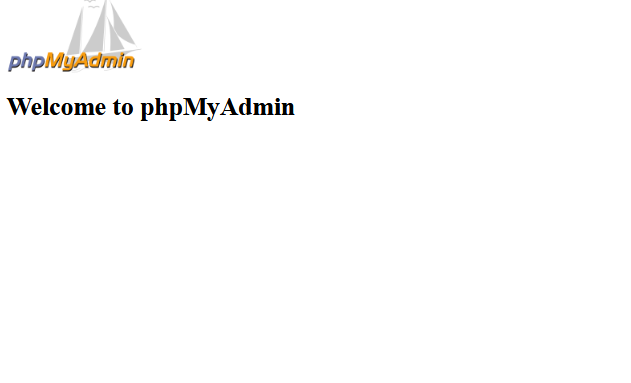
One of the customer reported an issue related to phpMyAdmin earlier today. He was getting a blank page of phpmyadmin that only says “Welcome to phpMyAdmin”

Once I hoped into the ssh and checked the cpanel error log file located under

/usr/local/cpanel/logs/error_log

I observed the following error:

PHP Fatal error: require_once(): Failed opening required './libraries/display_select_lang.lib.php' (include_path='/usr/local/cpanel/3rdparty/php/56/lib/php:.') in /usr/local/cpanel/base/3rdparty/phpMyAdmin/libraries/plugins/auth/AuthenticationCpanel.php on line 147

The error was peculiar because display_select_lang.lib.php wasn’t available in any other cpanel phpmyadmin source files I searched. Then I realized “AuthenticationCpanel.php” mentions the error which usually because Cpanel Authentication wasn’t done properly with the MySQL. Cpanel pass wasn’t synced with the MySQL.

Going to WHM >> Password Modification >> If you select the user and WHM shows you the ‘Sync with MySQL Password’ option, that means the MySQL password is outdated to cpanel and requires syncing (NB: If the password doesn’t require syncing, this option won’t be there). You can reset the pass and check the option to Sync the new pass with MySQL. That should restore your phpmyadmin.

[Tue Dec 19 20:40:07.097202 2017] [lsapi:error] [pid 532140:tid 139848266454784] [client IP.IP.IP.IP:25021] mod_lsapi: [host domain.com] [req GET / HTTP/1.1] Could not connect to lsphp backend: connect to lsphp refused: 111 (possibly memory limit for LVE ID 1789 too small), referer: domain.com

If you are running Cloudlinux, cagefs and lsapi with cpanel, you are probably familiar with the error. If the error is appearing for one or two sites, then it is probably because the user is hitting the VM/PM limit you have set through Cloudlinux. But if the error is appearing for all the sites, then it is because the cagefs fails with the suexec permission for some reason.

[Tue Dec 19 20:40:07.097202 2017] [lsapi:error] [pid 532140:tid 139848266454784] [client *:25021] mod_lsapi: [host *] [req GET / HTTP/1.1] Could not connect to lsphp backend: connect to lsphp refused: 111 (possibly memory limit for LVE ID 1789 too small), referer: http://*/

One way to solve the problem is to remount all the users. Sometimes, it doesn’t work and you may require to reinitialize cagefs again:

cagefsctl –remount-all
cagefsctl -r

I have seen times, when nothing works, but reinstalling cagefs does the trick. If cagefs doesn’t work, you may try disabling virtual memory from the CloudLinux LVE manager to see if that fix the problem. CloudLinux also has a known Virtual Memory 503 error issue with LSAPI.

How to create /var/cpanel/userdata files using /var/cpanel/users files

While reverting back from a reverse proxy like nginx/varnish installation, you might end up having an inconsistent /var/cpanel/userdata and /var/cpanel/users files. To be noted, /var/cpanel/userdata is used to create the httpd.conf file, while /var/cpanel/users are used to create the dns zone files. If you have an inconsistency between this two, you will have two different IP for named and httpd, which is undesirable. As the reverse proxy plays with /var/cpanel/userdata, which is why, we usually see the userdata folder containing incorrect data. Cpanel comes with a feature to reset userdata directory through it’s tools. Although, the tool uses a valid httpd.conf file or a backup to create userdata directory. Interestingly, if your httpd.conf isn’t valid that was created using an inconsistent userdata, can’t be used backward.

This is when you might require to create a /var/cpanel/userdata directory using the valid /var/cpanel/users directory. We ended up in this situation and written the following bash code to do the job for us:

#!/bin/sh

ls /var/cpanel/users/* > users.txt

while read line; do

UIP=$(grep “IP” /var/cpanel/users/$line|cut -d’=’ -f2)
sed -ie “/^ip: / c ip: $UIP” /var/cpanel/userdata/$line/*

#sed -i ‘/ip:/s/.*/ip: `echo $UIP`/’ /var/cpanel/userdata/$line/*

rm -f /var/cpanel/userdata/$line/*.cache

done < users.txt


The code deletes the cache files as well. Cpanel ships a script to rebuild the cache files, but for some reason it didn’t work for us. So we manually deleted the cache using rm. Please remember to backup the /var/cpanel/userdata and /var/cpanel/users directory before running the scripts.

Cpanel given cache rebuild command is:

/scripts/updateuserdatacache

Once the cache removal/build is completed, you may now rebuild your httpd conf file:

/scripts/rebuildhttpd.conf

service httpd restart

Backend log: PHP Warning: File upload error – unable to create a temporary file in Unknown on line 0

It is a common php error appears when PHP handler unable to detect the server temporary folder automatically. A solution to the problem is to define the upload_tmp_dir of the php explicitly. You can do that by editing the php.ini file. Here is an example on how to do it:

To find the running php.ini file, use phpinfo:

root@chicago1 [~]# php -r ‘phpinfo();’|grep php.ini
Configuration File (php.ini) Path => /opt/cpanel/ea-php56/root/etc
Loaded Configuration File => /opt/cpanel/ea-php56/root/etc/php.ini

As the command suggests, your php.ini file is located under the following:

/opt/cpanel/ea-php56/root/etc/php.ini

Now, edit the file using your favorite editor:
nano /opt/cpanel/ea-php56/root/etc/php.ini
Find the location of upload_tmp_dir, which is usually commented out like the following:

;upload_tmp_dir =

Uncomment it by removing the semicolon from front and define the temporary directory location:

upload_tmp_dir = /tmp

Restart your apache.

There is another way you can do it. To do this, go to WHM >> MultiPHP INI Editor >> Editor Mode >> Find upload_tmp_dir and edit it accordingly.

This would create a user.ini file to be included with the original php.ini file.

If none of the above solution works for you, you are probably seeing the error from modsecurity, try following the following steps to see if that overcomes the error:

ModSecurity: Multipart parsing error: Multipart: Failed to create file: /root/tmp/20170526-122120-WSfJYO2KhTvEz5johZF8UQAAAEw-file-9mmG15