Problem Definition:
I have some VPS clients using Virtualmin as their LAMP/LEMP stack. After some recent updates to Virtualmin, they started seeing some Postfix errors. The error is the following:
lost connection after STARTTLS from unknown[0.0.0.0]
Virtualmin used to configure postfix to allow ‘Non TLS’ connections to the port 587, which they recently stopped configuring. Now, if you connect to 587 port, you have to follow the TLS, no matter what. My clients didn’t bother to use TLS/SSL before, which caused the error.
Virtualmin comes with Let’s Encrypt. That’s make it easy to solve the problem TLS problem.
Solution Summary:
Here is the basic to solve the problem, first you make virtualmin to install Let’s encrypt SSL for the domain you want to use for SMTP. Virtualmin primarily going to install this for your Apache. Once done, Copy the same certificate to your Postfix, Virtualmin allows you to do it with single click.
Detailed Steps:
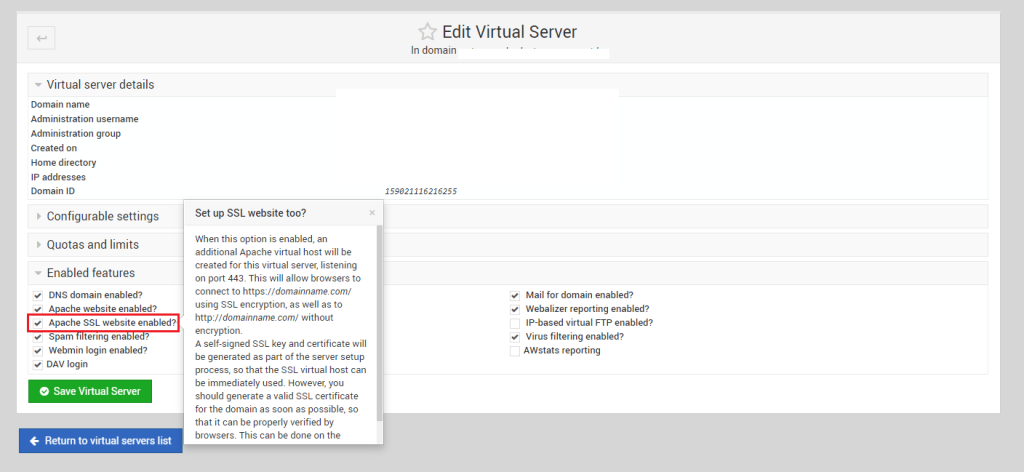
First, login to your Virtualmin at 10000 port, then select the domain you use for the SMTP. Once done, you can go to Edit Virtual Server and expand the option ‘Enabled Features’. From here check the option says ‘Apache SSL Website Enabled?’
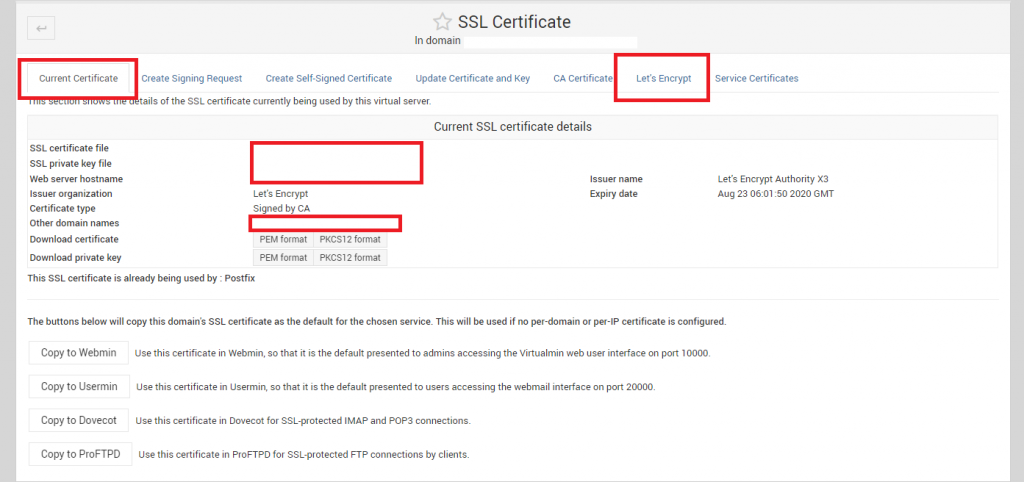
Next, go to Server Configuration >> SSL Certificate, we will get two tabs, ‘Current Certificate’ & ‘Let’s Encrypt’. Both are important. First go to Let’s Encrypt:
In the Let’s Encrypt tab, select the ‘Domain names listed here‘ and enter the domain that only has valid A Records or loads to the server, otherwise, remember, Let’s Encrypt won’t process for any single exception unlike cpanel or cyberpanel
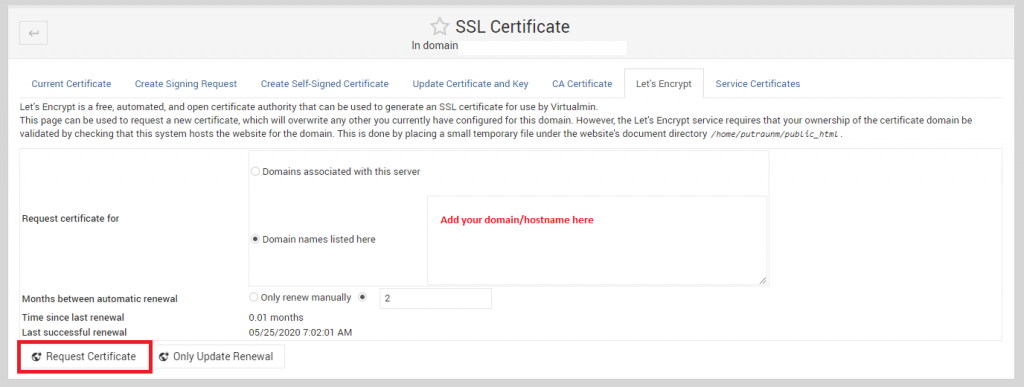
Once done, request the certificate. After the certificate installation is done, go back to ‘Current Certificate’ tab. On the bottom of the tab, there are couple of Copy To ‘Services’ option available. Here you should see the option says ‘Copy to Postfix’. Use that to copy the certificate to Postfix and use it during TLS/SSL transactions.
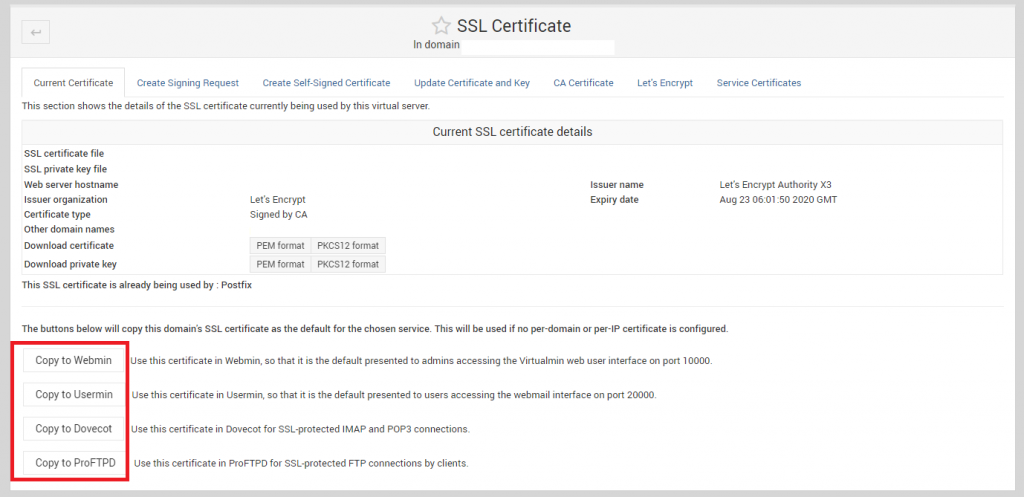
In my case, I have already copied the SSL to Postfix, which is why it is not showing the option ‘Copy To Postfix’. But the option should be above the ProFTPD.
Once done, you may now recheck and the SMTP should work with TLS and 587 port.