How to Backup/Dump and Restore PostgreSQL Databases

Here is the situation. We have a customer, who runs a POS backed by PostgreSQL. Customers want a second POS with the updated SQL till last night. Point to note, he didn’t want to use the Master/Replica or Master/Master replication, instead, a day earlier backup to be restored.

A similar situation is probably applicable for developers who are trying to work with staging and production environments and vice versa. In such a situation, you need a technique for dumping and restoring databases.

Backup/Dump Postgresql Databases

To dump the PostgreSQL database, you need to use pg_dump. First ssh to your server, change the user to Postgres, and then run the dump

su - postgres
pg_dump your_database > your_database_2021_13_11.sql

Here, your_database is the name of the database you are trying to dump.

Copy the SQL to the Remote Server

Once the dump is done, now you may copy the SQL file to the remote server. You may do that using rsync:

rsync -vrplogDtH --progress your_database_2021_13_11.sql [email protected]:/var/lib/pgsql/

Replace your_database_2021_13_11.sql with your SQL dump name and ‘ip.ip.ip.ip’ with the IP of your remote destination.

Restore the Dump

Now, ssh to the remote server, and continue with the following command:

# change to postgres user
su - postgres
# drop the old database
psql -c 'drop database your_database;'
# create database (replace your_username with the one you want to use for the database)
psql -c 'create database your_database with owner your_username;'
# restore database
psql your_database < /var/lib/pgsql/your_database_2021_13_11.sql

Once done, you should be able to use the new restored database. Good luck.
How to Restore MySQL Database Using SSH

This would be a simple step by step post for the help of my customers. You require two tools for this.

i) putty – ssh client
ii) WinSCP – File transfer client over SSH (You may use FTP or File manager as well)

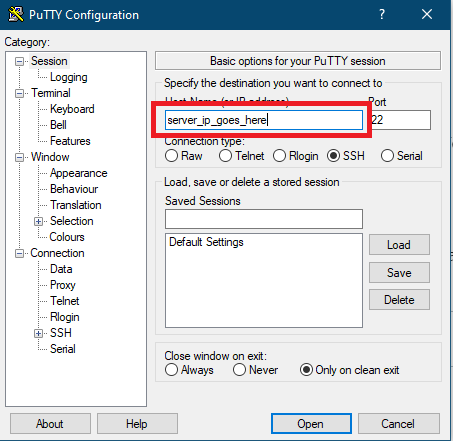
Once you download putty, open it, and use your server’s IP in the Host Name section:

Now, click on open. In the prompt, type ‘root’ as login as and enter. Then type the password and enter. If the password for the root is right, it will login to the command shell prompt or else it will put you in the authentication error console.

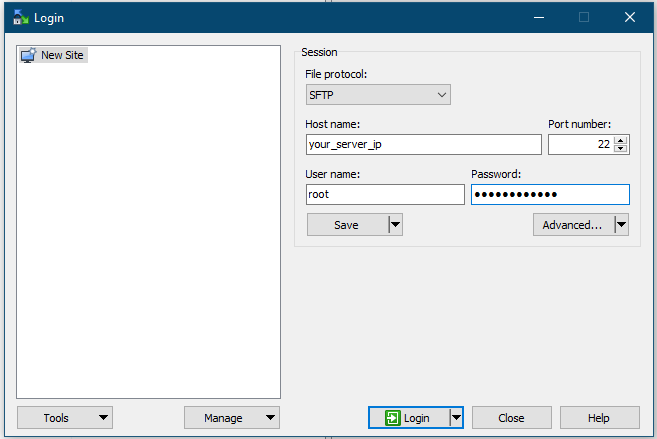
Now, open WinSCP to login to your server using the same manner of SSH. Once done, transfer your sql file to the home directory of root.

Login to your server using WinSCP
WinSCP Transfer

To transfer the file, navigate the sql file from your desktop on the left side and then drag it to the right side of WinSCP window. That will start the transfer. Remember the path of the destination on the server. Path is shown in the red marked area in the image.

Once the file is transferred, come back to putty, and change directory to the path you had noted in WinSCP, in our case, it is /root/

cd /root/
mysql -uusername -ppassword your_database_name < your_sql_file_name.sql

Remember the following. Your mysql username should go right after ‘-u’ without any space and the mysql password should be the same without space. Replace the ‘your_database_name’ with your original database name in the server and ‘your_sql_file_name.sql’ with the exact sql file name that you had uploaded.

Now if you allow sometime, the command should complete after the restore. If it returns any error, you would need to attend them to do a complete restore.